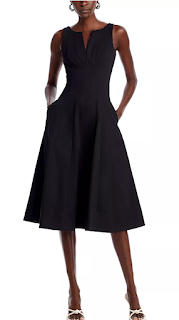
DIY Tiered Dress

Thursday, May 20, 2021


Let me just start off by saying, if I can make this tiered dress, so can you. 

The video has a lot of great visuals, but I wanted to provide specific measurements and more detailed instructions here. 

For best results, follow along with the video and reference this post.

To begin, I found this tablecloth at the thrift store for under €5.00. I am 5'2" and this was enough fabric for me to make a floor-length dress that had a lined bodice, straps, and three tiers. 

Let's begin with the bodice. First, you'll want to take some measurements. 

    The first measurement is at the widest part of your bodice. I wanted my bodice to be super tight (so I wouldn't have to wear a bra) so I took a deep breath in and then measured when I had left half of it out. My measurement came out to 82 cm. 

    Next, I measured how long I wanted the bodice to be by placing my measuring tape approximately where I wanted the bodice to begin and end. That measurement was 15 cm. If you're confused at all by this part, I highly recommend watching The Essential's Club's video that linked in the bio of my video. 

    To make the front and back of the bodice, I divided my bust measurement by 1/2, leaving me with 41cm. I marked out a rectangle on the fabric that was 41cm x 15cm. 

    Time to measure again. I took the measuring tape to see how far apart I wanted my straps to be, which came out to 24cm. I subtracted that from the length (41cm) and got 17. 17 divided by 2 is 8.5. So on both sides of the top 8.5cm in I made a mark. Then on each side, I measured 5cm from the top. Once you have done that, connect the marks to make a trapezoid. 

    Quick change up to figure out our straps. Eyeball how thick you want your straps to be (mine were about 6cm each. You can make them extra long, as we will shorten them to the perfect length later. Once you get them cut and sewn, flip them right sides out.

    Cut out the trapezoid and sew along the top with the straps sandwiched in the middle right at the edges of the top of the trapezoid. Flip to reveal your front bust piece. 

    To make the back, it is almost the same BUT you are going to make one piece for left and one for right, extending each piece at least 5cm past the middle (so at least 25.5cm for me). I repeated the process and flipped them right sides out. 

    Now to make the first tier. Use this formula:

The circumference of the last tier x 1.5 = the circumference of the next tier. 

    My bodice was 82cm, BUT I used a measurement of 72 instead because I was a bit worried about running out of fabric (I literally had just enough). So 72x1.5 = 108 for my first tier's circumference.

    To find the length, you'll want to put on your bodice and measure from the bottom to where you want the skirt to fall (I made mine floor length). I got a measurement of 98cm and divided it by 3 (for 3 tiers). That comes out to 32.666666666, but I used 32.7 because... well, because. 

    I did each tier in 2 pieces, so I marked out the front half of the first tier which came to 54cm x 32.7cm. For the back, I divided 54 by 2 to get 27 and added 5 cm (just like with the bodice), and got 32cm. 

    I then sewed the two back sides to the front along the sides, leaving the back open for my zipper. I then created a temporary basting stitch at the top of the tier and bunched it up to make ruffles. Once I liked how they looked, I pined them and sewed them into place while joining this tier and the bodice. 

    Now it's time to try it on. I pulled the fabric together and adjusted it to the fit I wanted and marked it. I then folded it back on each side and sewed it up. 

    Using the video I linked, I put the zipper in and then released the basting stitch I had. Since my zipper ended midway through the first tier, I  joined the remaining part with an invisible stitch by hand. 

    Okay, home stretch, and the hard parts are over! Since the last tier was 108cm, the next tier came out to 162cm. I then divided that by 2 to get 81cm for the front and back panels. I sewed up each side to create a big loop. I repeated the basting stitch at the top, ruffled, pinned, and sewed it. 

    The last tier came out to 243cm, then (you guessed it) divided by two to get 121.5 for the front and back pieces. I repeated the process on this tier and sewed it up. 

    I then put the dress on (and was amazed that it looked this good) the back was about 5cm longer than the front just because of how it fell naturally on my body. I marked where I wanted it to end (with some help from my obliging fiancé) and hemmed it up. 

    As I went along I overlocked most of my seams, but if you haven't done that or have some left, now is the time to do that. 

    And voilà! A perfect tiered dress! 


My Top 5 Sustainable Brands

Thursday, April 22, 2021

Hello! I made a reel in honor of Earth Day and shared 5 of my favorite sustainable brands! I've linked exactly what I showed in the reel here, in case you want to shop! 

Girlfriend Collective 

Compressive High Rise Leggings in Moss

Topanga Bra Top in Moss

Native 

Plastic Free Deodorant in Coconut & Vanilla 

Organic Basics

Cotton Triangle Bra

Veja

Espalar Sneaker

V-10 Sneaker

Ana Luisa

Alyssa Necklace

Noa Ring

Rope Bold Ring

Happy Earth Day!

My Secret Skin Booster: Glow Recipe Watermelon Glow Sleeping Mask

Tuesday, May 26, 2020

Graphic: @desingsbyriann
Dry, dull skin is something I won't tolerate. Amongst all of my skincare woes, I get the most irate when my skin looks tired and lifeless. Conversely, I love a product that works well and works fast. The Glow Recipe Watermelon Glow Sleeping Mask addresses dull, dehydrated looking skin and makes it look luscious and plump in record speed. It has been a favorite of mine for over a year! 

First, let's talk about consistency. The mask has a jelly-like feel that is so satisfying in the hand. When you take a scoop out, the rest of the product slides back into the jar and levels off into perfectly coagulated gel. It's so satisfying. 

The product also has a fun watermelon aroma. I am the type of person that is very particular about scents, but the candy watermelon smell doesn't bother me. In fact, I associate it with the feeling of joy that only a night of indulgent skincare can inspire. 

The product sits on the skin nicely, I was afraid that it would slide around based on its consistency, but it dries and adheres to the skin beautifully. Glow Recipe recommends using this mask as an overnight mask, but also says it works as a 10-minute mask if you're low on time (and aren't we all?). While my skin's appearance is improved after using it as a 10-minute mask, using it overnight certainly delivers more dramatic results.  

Every time my skin needs a little pick me up, this mask is my go-to! I usually will forgo my evening skincare routine to do this mask once every two weeks. Try it and watch your skin go from tired to plump and radiant in record speed!  

Click to shop:


The Ordinary - How to Know What to Buy, What to Try & What I'm Getting Next

Wednesday, May 6, 2020

the ordinary
Graphic: @designsbyriann

The Ordinary is one of the most unique brands in the beauty space at the moment. From the straightforward product line to the simple packaging to the shockingly affordable prices, The Ordinary has been a maverick in the beauty industry since its launch in 2016.

As a seasoned beauty blogger and skincare enthusiast, I often find myself chatting with my friends about the topic. I have noticed that my friends are always split when it comes to The Ordinary- half have tried it and have a product or two that they swear by and the other half want to try it but are not sure where to start. The latter is a more than an understandable place to be as the products are a bit difficult to decipher if one is not familiar with the compounds and chemicals offered in their repertoire. At first, this can be intimidating and even off-putting, but fear not, there are a few great ways to decide what to try from this amazing brand.

How to Know What to Buy

Ingredient Focus 

When deciding what to try first from this brand, my advice is to go with what you know. For example, my first foray into the brand was with a retinol because I know my skin loves the benefits of this powerful vitamin. My first purchase from The Ordinary was their Granactive Retinoid 2% Emulsion. It worked well enough, but I decided to try the Retinol 1% Squalane this time around (more on that later). Next, I added "Buffet" to my cart because it was a peptide cocktail and my skin has reacted very well to peptides in the past. Lastly, in my latest haul, I added Hyaluronic Acid 2% + B5 because this acid is known in the beauty biz as having an amazing plumping and hydrating effect.

A worry that I had was mixing certain ingredients without knowing which ones would play well together (or rather, not play well together). Luckily, The Ordinary lists "contradictions" on their site under each of their products giving a list of which products should not be mixed.

By picking products based on ingredients I knew my skin already loved, I was able to decipher the somewhat dauntingly straightforward landscape of the line. But what if you haven't experimented with a bunch of beauty products and don't know which ingredients to look out for?

Best-Sellers & Reviews

This might sound like the most obvious way to pick products, but The Ordinary has quite a few "holy grail" products that come up time and time again. Luckily, beauty behemoth Sephora always has many review contributions- and they now sell The Ordinary! Some well-known best sellers in the beauty blogger universe include the aforementioned "Buffet", the AHA 30% + BHA 2% Peeling Solution, and their retinoids. I have the Peeling Solution in my basket as I type! 

Kits - Personalized and Ready-Made

If research sounds like a tall order, I don't blame you! Other options include having a rep from the brand suggest products to you based on your areas of concern (acne, aging, hyperpigmentation, etc.). You can do this by visiting a store or online through their website!

However, if you want the least amount of friction to getting some of these amazing products on your face stat, you can purchase one of their pre-assembled kits.

What To Try

Hits

I've been using "Buffet" and Hyaluronic Acid 2% + B5 every day for about a month now and- whew- what a difference! My fiancé noticed an improvement in my skin after just a few days of using these serums. I am so pleased with them. As a result of adding these to my skincare regimen, I have seen my skin look plumper, more hydrated, brighter, and some of my less-severe acne has also cleared up. I think I need to add another product to control my acne further, but so far this duo has done wonders for my skin! The Granactive Retinoid 2% Emulsion was also impressive when I tried it, but since it has been a year, I plan to try it again and reevaluate. 

Miss

There is only one "miss" to report and I feel a little torn about it. When I placed my latest order I wanted the most "high voltage" retinol I could get. I figured it would be best for my skin since the retinol I had used before moving to Holland was prescription-grade. I made the assumption that an OTC retinol would never be as strong and decided to buy the Retinol 1% Squalane. The Ordinary recommends starting with a lower power retinol and building up to this one on their site. It actually cleared my small bumps really well, but I did notice the development of a few dark spots about 6 days in. For that reason, I stopped using it and will be going back to the gentler Granactive Retinoid 2% Emulsion (when it is back in stock- apparently it has been sold out for months!). 

What I'm Getting Next

I'm blown away by the price and quality of this brand- so much so that I cannot wait to place another order. My next purchase is going to include the AHA 30% + BHA 2% Peeling Solution because it's a bestseller and word on the street is that it has the same active ingredients as the Sukari Baby Facial by Drunk Elephant. I would also love to try the Squalane Cleanser because the reviews are stellar!

I cannot wait to try more from this line and report back! Have you tried The Ordinary? What were your thoughts? 

UPDATE

After experimenting with The Ordinary for a few months, I finally have a fully The Ordinary skincare routine! If you'd like to see the whole thing check out my video below!


Shop The Ordinary


Travel Guide: Vienna Austria

Thursday, February 20, 2020

One of the best parts of living in Amsterdam is easy to access to flights all around Europe. My fiancé and I are doing our best to take advantage of this and recently returned from a trip to Vienna, Austria. When I was planning our trip to Austria, I saw pictures of the note-worthy buildings and museums, but it did not inspire too much excitement on my end. I did my due diligence and put together an itinerary pulling from travel resources such as Rick Steve's Europe videos and blogs linked on Pinterest.

Once I arrived, I was absolutely floored by how gorgeous and wonderful Vienna is. On day one, we began by visiting the upper Belvedere museum. Housed in the summer palace built for Eugene of Savoy, the baroque palace is a marvel of beauty. Upon the grounds are thoughtfully appointed gardens, amongst which several locals took a morning jog. 

The baroque palace itself sits upon a hill with a view of Vienna in the distance. The sweeping staircases and beautiful marble halls with painted ceilings are breathtaking. Inside, you can view many famous artworks, and perhaps most well known is Gustav Klimt's The Kiss

Once finished at the Belvedere, we headed to the famous Cafe Central. Known for its famous regulars such as Trotsky and Freud, this cafe has become iconic in Vienna. They offer an understated elegant ambiance, as much of Vienna does. 

It was then a short walk to the Hofburg Palace (which is a must-see, but that goes without saying). Today, it is still the residence of the President of Austria. The tickets to the Royal Apartments were bundled with admittance to the Royal Silver Museum and Sisi Museum- all housed in the Hofburg. 

At first, I did not wish to visit the Royal Silver Collection, but I am so glad I did! The Hapsburgs had an entirely unfathomable amount of platters, saucers, taurines, candelabras, etc. I still have trouble wrapping my mind around the sheer enormity of the collection! 

We were then lead to the Sisi museum which detailed the life and assassination of Empress Elizabeth, lovingly nicknamed Sisi. Although born in 1837, she was a modern woman. She and her husband Franz Joseph I were not afraid of innovation. She had one of the first "bathrooms"- as in a room with a bathtub in it- and even exercised daily although it was seen as unladylike to do so. 

The Sisi museum lead us into the Royal Apartments which were strikingly beautiful, showed the unique style and personality of Sisi and further hit home that these people had lots of nice things and wealth. 

After a stroll around the Museum Quarter, it was time to visit St. Stephen's Cathedral. It is well known for its colorful tiled roof and Gothic and Romanesque design. Once we took a look around, we decided to get a better view of the Cathedral by viewing it from Onyx Bar across the street. If you are partial to well-mixed cocktails and city views, Onyx Bar should be a stop on your Vienna Tour. 

The next day we were off to the Vienna Operahouse for a matinee performance. It was an absolutely gorgeous building and the performance we saw was in a wing of the Operahouse. Next time I visit Vienna, I will be sure to see a performance on the main stage!

After a quick lunch of a Vienna Sausage from a cart outside the Operahouse, I wanted to get a better look at the Karlskirche, a baroque church that is a prominent part of the Vienna cityscape. Our first day in Vienna had displayed unusual weather for early February, boasting sun and tepid temperatures, however, the weather was much more seasonably appropriate on day two. It began to rain so my fiancé and I took an Uber to the Vienna Ring Tram starting point for a tour. I highly recommend this tour! It was recommended to us on the first day by an Uber driver and it was such a fun and whimsical way to view and learn about Vienna! 

The Ring Tram is an adorable yellow tram that circles the Ring Road in Vienna. This road is home to most of the must-see sightseeing destinations in Vienna. As you take your ride, the audioguide points out the important buildings and gives some historical background. This was the perfect way to see this part of Vienna- especially on a cold and wet day! 

After dinner, we made our last stop in Vienna at L. Heiner Bakery for a slice of Sachertorte. A Viennese delicacy invented for Prince Metternich in 1832, Sachertorte is chocolate cake with an apricot jam and dark chocolate ganache. 

Although our trip to Vienna was brief, my fiancé and I agreed that it is a city that we cannot wait to visit again! 

If you'd like to see a video of my trip, check it out below! 

Group Fitness Changed My Life

Wednesday, January 29, 2020

I never thought of myself as an "LA" girl, but since moving to Europe I have realized that I am very "LA". Furthermore, this post is bound to be the most "LA" piece on my blog as it is all about how group fitness changed my life. I know that may sound fairly dramatic but when I think about how I viewed exercise before trying group fitness classes and how I view fitness now... it's like night and day.


Before I signed up for group fitness classes, I was a fairweather gym visitor. Some weeks, I would go three times and some weeks I wouldn't go to the gym at all. When I would get to the gym, I would feel a little lost. I had a personal trainer in the past but I always struggled to feel like I was working long and hard enough on each muscle group, not to mention I always feared I was missing a muscle or two entirely. Each gym trip also was accompanied by thirty minutes on the treadmill. While I still hop on a treadmill from time to time now, at this point I felt like this was my most productive part of being at the gym and, boy, was it a long and monotonous thirty minutes. On top of everything, going to the gym was something I thought of as a boring, annoying, uncomfortable task - but I assumed this is how everyone felt. I had no idea that going to the gym could be- dare I say it- actually fun.

I had noticed a barre studio in my neighborhood three whole years before I got the courage to go and try a class. I had danced in high school and I always felt that dance was the only workout I had ever tried that I didn't absolutely loathe. I finally got over my shyness and anxiety about trying something new by bringing my mom to a class with me at the barre studio.

My first class was horrendous. The pace was fast, the positions were new, and halfway through I had to step out and catch my breath because I was lightheaded and thought I might faint. Still, I felt like something was there. I felt like I could get better. I kept going. My mom is a fit lady and decided that while she liked barre, she is more of a spin person, so I had to start going alone.

At first, I would go to class at 5:30 pm for one hour, come home exhausted and shower and go straight to bed. I started going 2-3 times per week. It was difficult but I felt myself mastering the class, knowing what to expect, and getting stronger.

After a few months, I was going to class 4-5 times per week. I started to build relationships and settle into the community of my studio. Most surprising of all, going to my class was the highlight of my day.

From time to time my studio would run a promotion: If you attended 30 classes in 30 days, you would get a free month of unlimited classes. I was daunted by the thought of coming to class that many days in a row, but I made it my mission to try it. I figured I would shoot for the moon and land amongst the stars. No one was more shocked than I that at the end of 30 days I had been to the studio 30 times.

After that, I started visiting the studio every day I could. If it was a weekday, I was at the studio, guaranteed. If I wasn't traveling on the weekend, I was in class and ready to sweat. I became friends with the instructors and my fellow regulars. I loved socializing and working out all in one place. My body was so much stronger. I felt like I could rely on my own strength for the first time in over ten years. I got to the point where missing my class was like missing a social date with my girlfriends.

When I moved to Europe, it was hard for me to leave my beloved studio and my friends. Moving to a new city can be isolating, especially for those of us that work from home. While I still miss my studio and the fantastic workout that I got there, group fitness was a great way for me to make new friends and be social in my new city. Very luckily for me, every class I've taken here in Amsterdam has been taught in English. While I'm still looking for the exact studio I want to call my "home base", I've found ClassPass to be a terrific way to try studios in the area without having to commit.

I've done yoga, spin class (pre-Amsterdam Riann did NOT spin), and barre at studios all over town. I've met so many lovely people and had the opportunity to try things I would not have before! Two classes that really mixed it up for me are "face-lift" yoga (cannot wait to report back to you on that one) and Ashtanga yoga! Plus I am planning on signing up for hot yoga and kickboxing!

Whether you decide to try an aerial silks class at a studio in your neighborhood or sign up for ClassPass, I hope you give group fitness a chance! You have so much to gain!

Oh, and for sustainable, ethical workout sets check out my video about Girlfriend Collective!


Travel Guide: London

Thursday, November 21, 2019


London Calling! London is an exciting and picturesque city. Big Ben, The Shard, and the London Eye all gaze down upon the town speckled with red telephone booths, double-decker buses, and hackney carriages. London has no shortage of things to do and it can be a bit overwhelming when planning a trip to the home of the British Crown. I've detailed my favorite London experiences below.

Westminster Abbey, Buckingham Palace & Big Ben

Big Ben and Westminster Abbey are must-see parts of London, of course! Westminster Abbey was built in 1245 and is where Queen Elizabeth II married Prince Philip. Big Ben first rang in 1859 and is perhaps the most recognizable symbol of the city of London. Many travel resources recommend watching the changing of the guard in front of Buckingham Palace, but it is very crowded with tourists. I recommend watching the changing of the guard at the Tower of London instead as it has just as much pomp and circumstance with almost no crowd at all.

Tower of London & Tower Bridge

The Tower of London might be my favorite historical spot in London. The tower that was once a fortress and castle now houses a museum displaying the English crown jewels, armory, and much of England's gorier history. It is the famous site of Anne Boleyn's infamous beheading. It is well worth a visit, and don't forget to walk Tower Bridge over the Thames while you're in the area.

London Eye

When I was first planning my trip to London, I was skeptical that the London Eye was a tourist trap that would prove to be a waste of time. I am so glad that I decided to go because the Eye provides an unobstructed, 360-degree view of all of London and the Thames that runs through. You will be able to see for miles around. I recommend booking a ride at sunset after a day of walking around the area. You'll be able to see all of the ground you covered from a new perspective. I decided to book the Champagne Experience on TripAdvisor for a few pounds more than a regular ticket. Not only do you get a glass of champagne, but you also get to skip the line. It is a wonderful experience and you can learn more about it in my video about it here and see it in my vlog here.


Tea at the Ritz London

Afternoon Tea is a well-known English tradition and where better to observe this ritual than at an iconic English establishment such as the Ritz London. Famous for being a meeting place for Winston Churchill and the one time home of Margaret Thatcher, this luxury hotel has its fair share of stories to tell. I booked a champagne afternoon tea service and the champagne is from the Ritz's very own label. It is elegance and luxury to a... well, t(ea)!


Harrod's

London's famed luxury department store is another must-visit locale. Even the most experienced luxury shopper has never seen nor will ever see anything like Harrod's. Boasting more than one million square meters of space and housing over 300 departments, Harrod's is the epitome of opulence. I started in the basement and worked my way up, stopping for a prosecco and pizza break in the middle. If you're looking for the "luxury version" of everything from letter openers, to baby carriages, Harrod's will produce just what you need.


British Museum & National Gallery

I always make a point to visit the famed art museums of any city I travel to, which is why it was so painful for me to miss out on the British Museum and National Gallery during my first trip to London. On my second trip, these museums were my top priority. The British Museum is home to the Rosetta Stone and Egyptian mummies as well as many other artifacts from various ancient cultures. The National Gallery is home to works by many famous artists from Raphael to da Vinci to Van Gogh.

West End Theater Production

The theater is a huge part of London's identity which is due in part to the famed English playwright, Shakespeare. The West End is London's theater district and catching a live performance is not only a unique experience, but it is also very traditionally English indeed.

The Shard

The Shard is the tallest building in the European Union and the United Kingdom at 95 stories. It is home to Oblix Restaurant and the food and view are both sensational. Take in the views (and, if you're lucky, fireworks) looking West toward the Eye and Big Ben. Once you finish your meal, head up to Gong Bar. Gong is the highest hotel bar in the Western Hemisphere with breathtaking views toward the East overlooking the Tower of London and Tower Bridge. While food and drinks are on the pricey side, it is a wonderful way to mark your last dinner in the city before heading home.


I hope this post helps you plan your trip to London! If you'd like to see my recommendations in-depth check out my London vlogs below!


Design by Studio Mommy (© Copyright 2015)